ESP32 Cam: cropping images on device
The ESP32 camera is the cheapest microcontroller with a built-in camera that you can buy. The OV2640 sensor has a max resolution of 1600x1200, but sometimes you don't need the entire image.
In this post I'll show how to crop the images on the ESP32 itself, before sending it of to your preferred (cloud) IoT service.
Step 1: Configuring the camera
Most code examples for the ESP32 cam use JPG encoding when taking pictures. This makes sense as it compresses the image.
However, for cropping, we need to capture in a raw format. I changed the camera configuration so that the pixel_format is set to RGB565:
static camera_config_t camera_config = {
    // ... other parameters

    // Set the pixel format to RGB656. This is a RAW format where each pixel
    // is represented by 2 bytes. Be aware of high memory usage!
    .pixel_format = PIXFORMAT_RGB565,
    .frame_size = FRAMESIZE_SXGA,
    .fb_count = 1
};
Be aware: RGB565 uses 2 bytes for each pixel. At SXGA resolution, you'll be using 2.6MB of PSRAM (1280x1024x2).
Most ESP32 cam boards have 4MB of PSRAM, which should be sufficient for this resolution. If you need higher resolutions, you'll need a board with more PSRAM.
Step 2: create the crop function
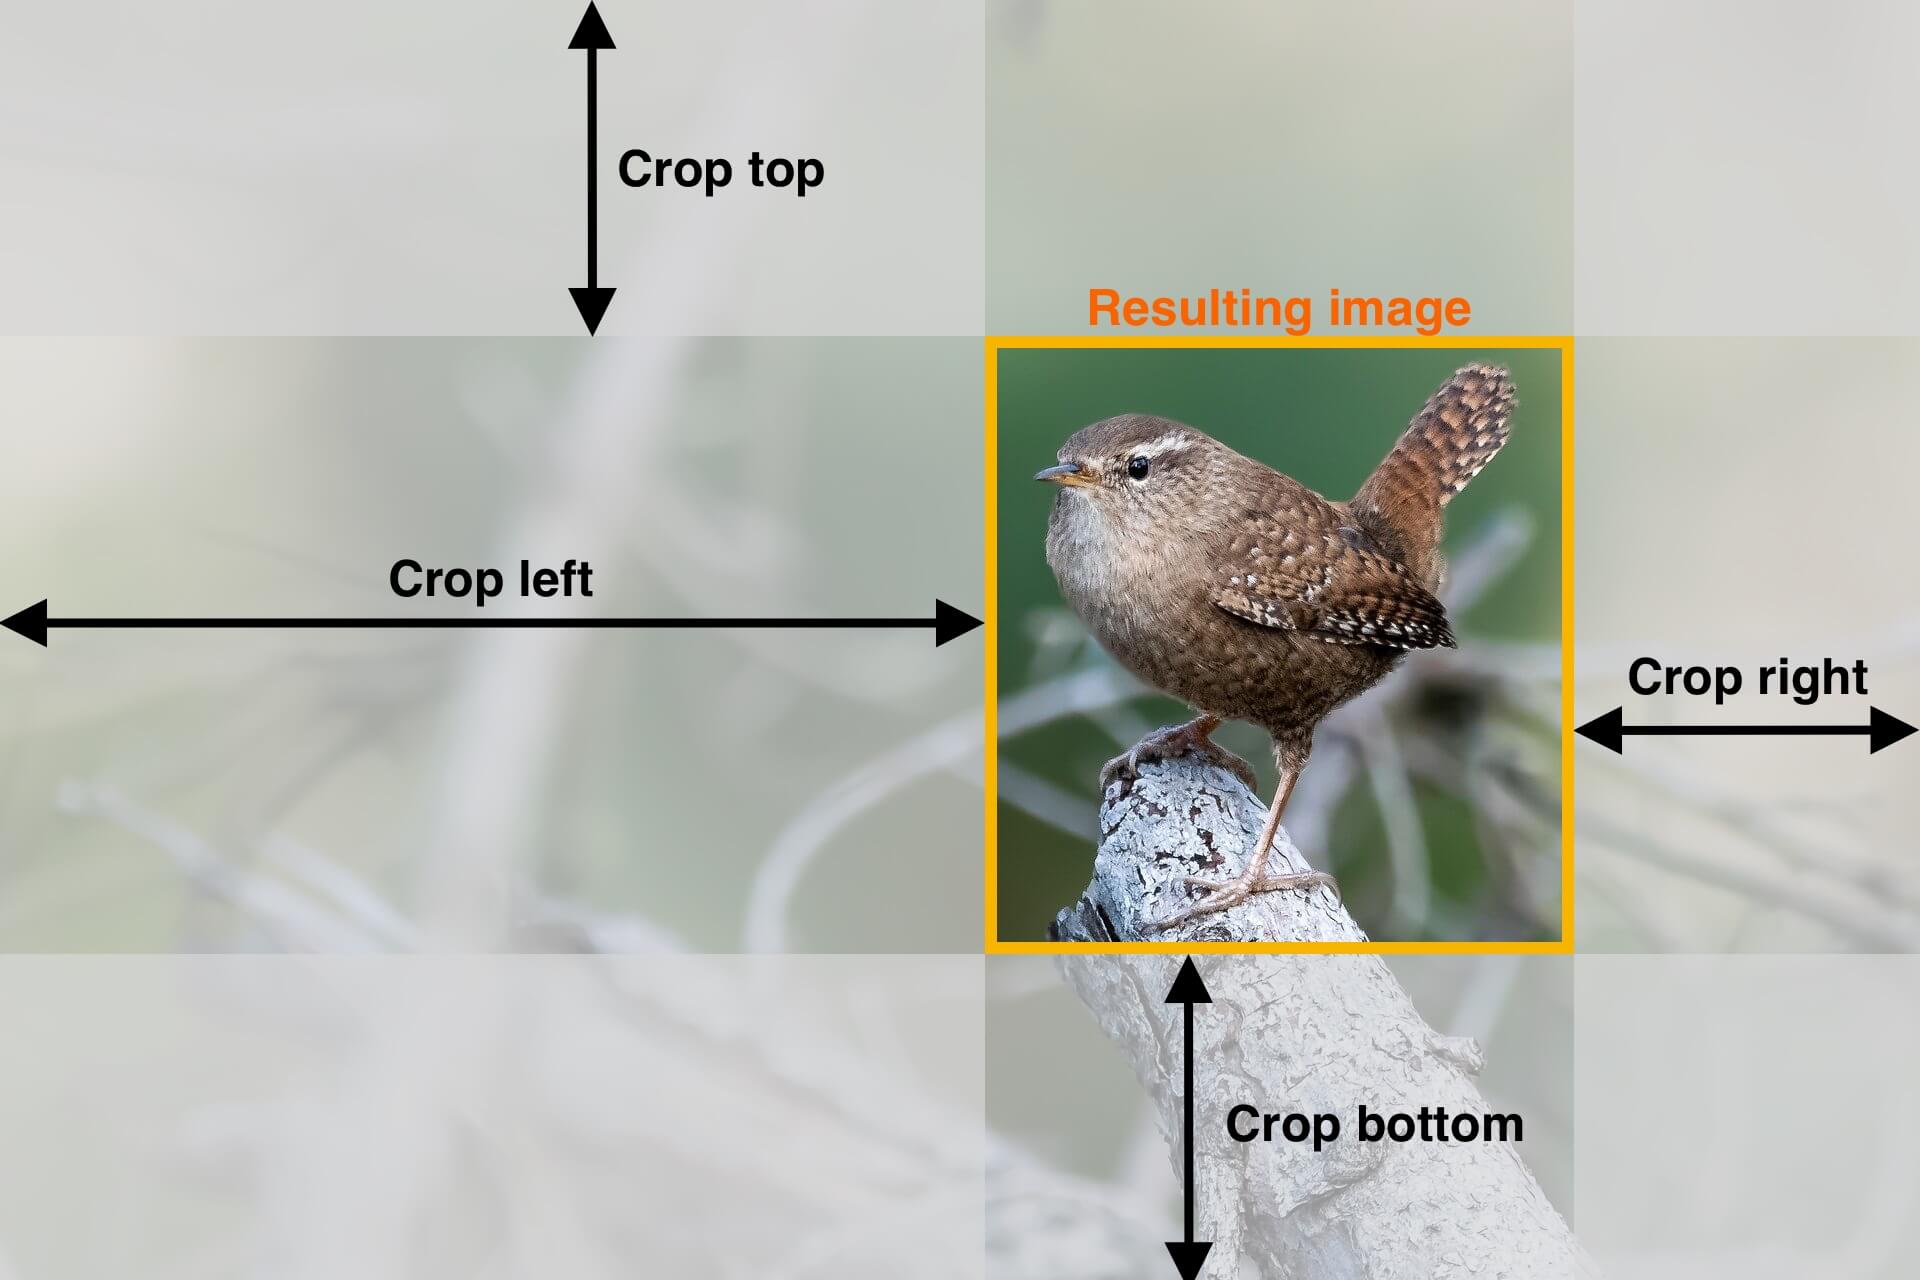
I then created a crop function that takes your frame buffer as input, along with your cropping parameters.

Visualization of the crop parameters.
It will then crop your image, store the resulting image back in your frame buffer fb, and change the width, height, and len of it.
void crop_image(camera_fb_t *fb, unsigned short cropLeft, unsigned short cropRight, unsigned short cropTop, unsigned short cropBottom)
{
    unsigned int maxTopIndex = cropTop * fb->width * 2;
    unsigned int minBottomIndex = ((fb->width*fb->height) - (cropBottom * fb->width)) * 2;
    unsigned short maxX = fb->width - cropRight; // In pixels
    unsigned short newWidth = fb->width - cropLeft - cropRight;
    unsigned short newHeight = fb->height - cropTop - cropBottom;
    size_t newJpgSize = newWidth * newHeight *2;

    unsigned int writeIndex = 0;
    // Loop over all bytes
    for(int i = 0; i < fb->len; i+=2){
        // Calculate current X, Y pixel position
        int x = (i/2) % fb->width;

        // Crop from the top
        if(i < maxTopIndex){ continue; }

        // Crop from the bottom
        if(i > minBottomIndex){ continue; }

        // Crop from the left
        if(x <= cropLeft){ continue; }

        // Crop from the right
        if(x > maxX){ continue; }

        // If we get here, keep the pixels
        fb->buf[writeIndex++] = fb->buf[i];
        fb->buf[writeIndex++] = fb->buf[i+1];
    }

    // Set the new dimensions of the framebuffer for further use.
    fb->width = newWidth;
    fb->height = newHeight;
    fb->len = newJpgSize;
}
Step 3: Take a picture, crop it and convert it to JPG
To use the crop function, you must first take a picture. This is the standard ESP32 camera code:
// Take picture
printf("Taking picture...\n");
camera_fb_t *fb = esp_camera_fb_get();
if(!fb) {
    printf("Could not take picture \n");
    // Handle error
}

printf("Picture taken: %d bytes \n", fb->len);
When successful, you can pass the frame buffer fb to the crop function and give it the desired dimensions:
// Crop image (frame buffer, cropLeft, cropRight, cropTop, cropBottom)
crop_image(fb, 550, 450, 100, 190);
At this stage, the frame buffer will contain the cropped image in RGB565 format. To convert it back to JPG, we need to allocate a new buffer in PSRAM. In this case, I allocate 200k. Then, you can use the fmt2jpg function to convert the RAW format into JPG.
// Create a buffer for the JPG in psram
uint8_t * jpg_buf = (uint8_t *) heap_caps_malloc(200000, MALLOC_CAP_SPIRAM | MALLOC_CAP_8BIT);

if(jpg_buf == NULL){
    printf("Malloc failed to allocate buffer for JPG.\n");
}else{
    size_t jpg_size = 0;

    // Convert the RAW image into JPG
    // The parameter "31" is the JPG quality. Higher is better.
    fmt2jpg(fb->buf, fb->len, fb->width, fb->height, fb->format, 31, &jpg_buf, &jpg_size);
    printf("Converted JPG size: %d bytes \n", jpg_size);
}
At this point, the cropped JPG is available in jpg_buf, and its size is stored in jpg_size (bytes). If you want, you can now release the original frame buffer to free up some memory:
esp_camera_fb_return(fb);
How images are represented
You might be interested how the cropping algorithm works. First, you must understand how images are represented in the ESP32's memory.
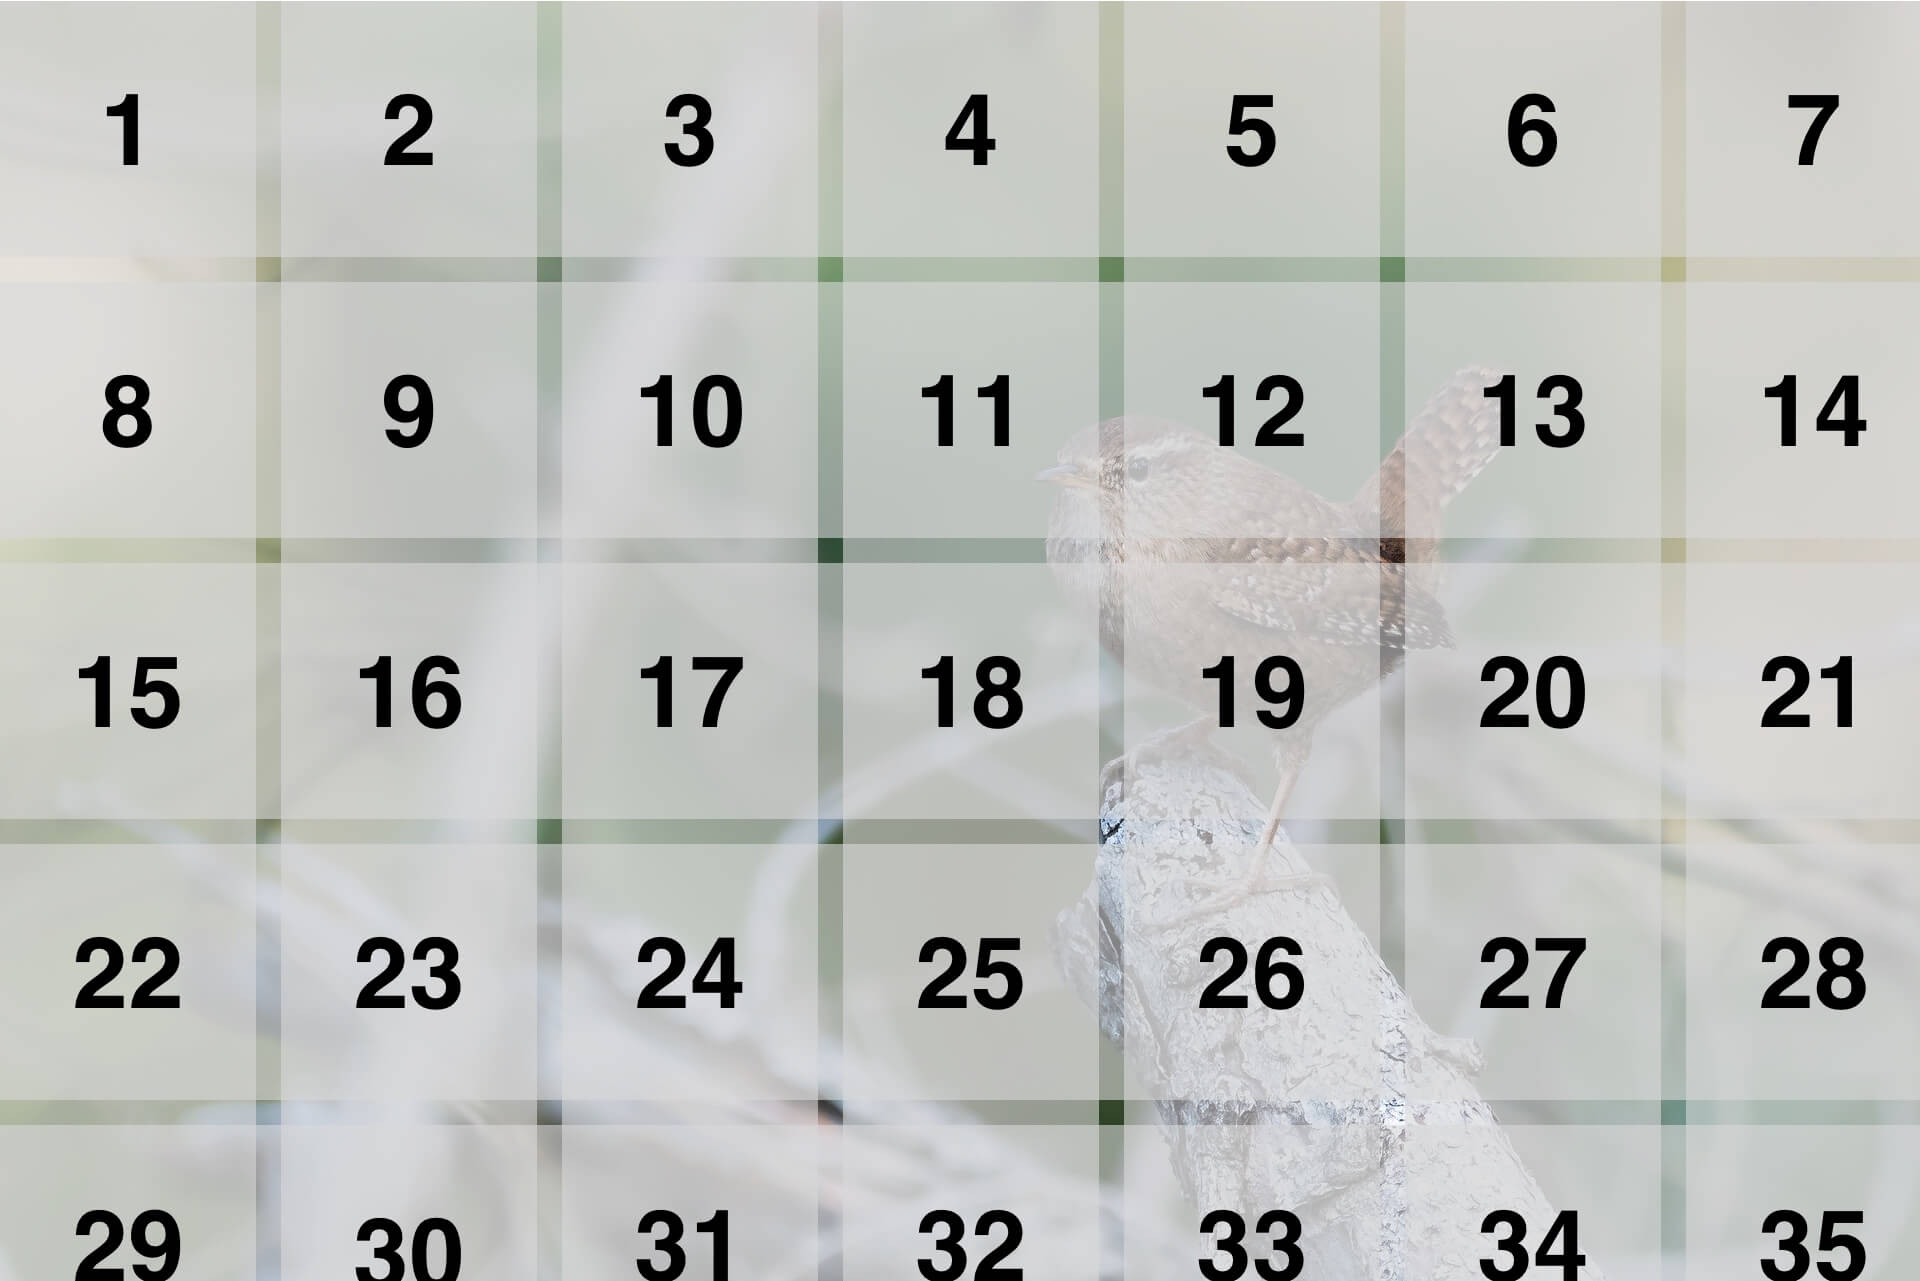
Visually, we see an image like this:

Each pixel of the image is laid on a grid that's determined by the width and height of the image.
However, inside the microcontroller's memory, an image is nothing more than a single-dimension array. All pixels are in a single list, one after the other:

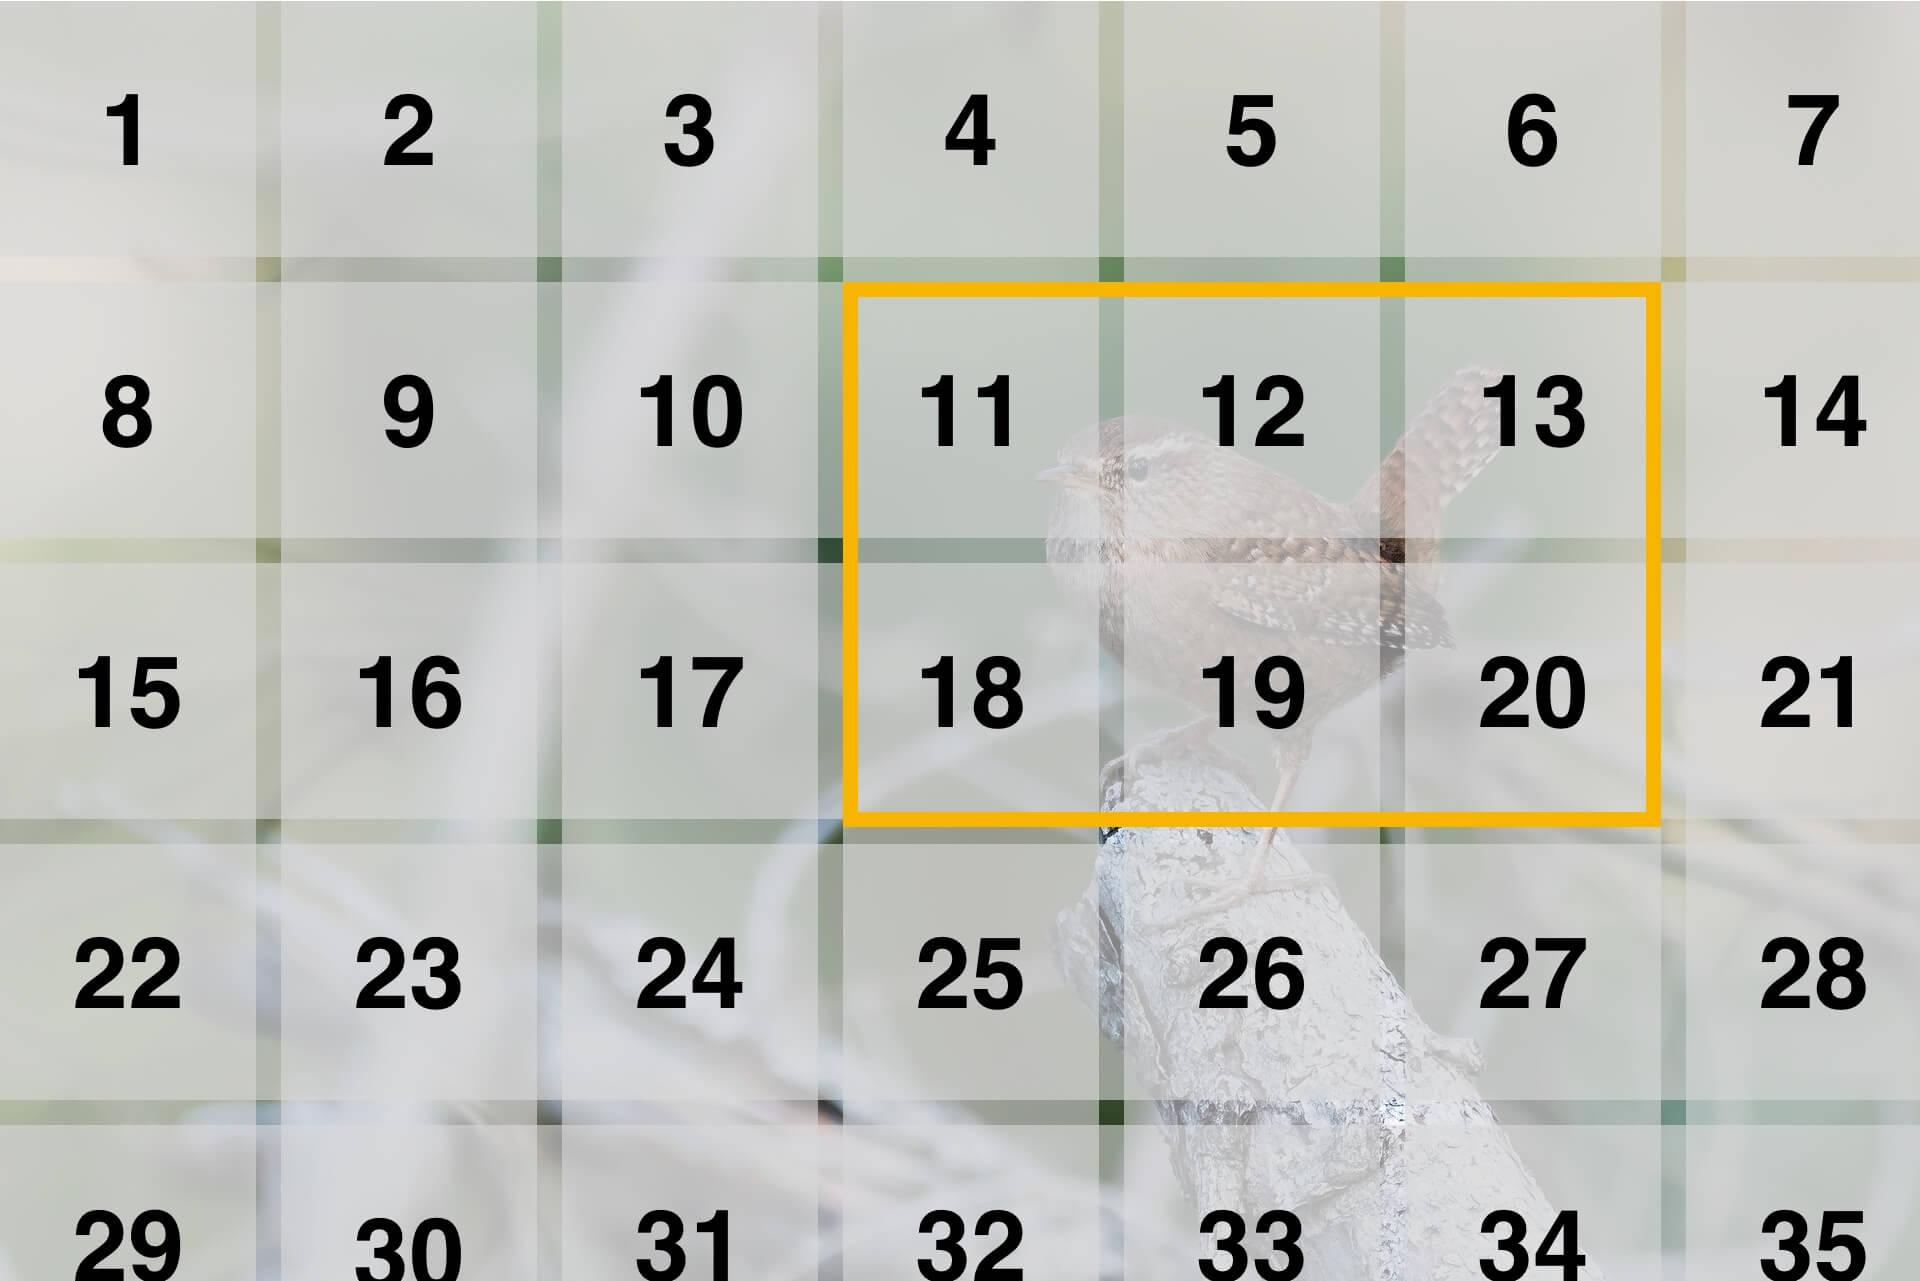
To crop the image, we need to figure out which pixels to keep and which to skip. You can determine this by using the image's width, height, and a series of modulo operations (see the algorithm).
So this cropping area:

translates to these pixels in memory:

Now that we figured out which pixels we want to keep, we need a place to store them. You could allocate a new buffer for this, but that's wasteful and might not be possible. In this case, my RGB565 photo takes up 2.3MB of memory. If I want to crop out just a few pixels from each side, I would need another buffer of 2.3MB. That would exhaust all of the PSRAM that most ESP32's have (4MB).
Luckily, we can re-use our existing frame buffer! While looping over all pixel data, you check if you want to keep the pixel or not. If you want to keep it, insert it back into the beginning of our frame buffer, overwriting the original pixel that was in there.

This solution requires no additional PSRAM memory. Yay!
Just remember to count how many bytes you've carried over and change fb->len accordingly. Otherwise, part of the old image would still be there.
VSYNC errors
Capturing RAW images with high resolution could lead to a VSYNC error:
Timeout waiting for VSYNC
The esp32-camera component is to blame. It has a fixed timeout for moving image data from the camera sensor to the PSRAM. You'll run into this timeout when taking large, RAW photos.
If you're using ESP-IDF (with or without the Arduino component), you can change this timeout.
Edit the file esp32-camera/driver/camera.c and locate line 198. You should see three timeout blocks like this:
if((esp_timer_get_time() - st_t) > 1000000LL){
   goto timeout;
}
Change all 3 timeouts to a bigger value. For SXGA resolution, a 50% increase will do:
if((esp_timer_get_time() - st_t) > 1500000LL){
   goto timeout;
}
Flash the program to your board, and the VSYNC error will be gone!